What Does a Bad Wheel Bearing Sound Like?

Hearing any abnormal noise while you drive is stressful. With so many moving parts making up your car, it can be nearly impossible to tell where that humming, whining, or whirring noise is coming from. A common issue that many drivers run into is a failing wheel bearing, which can present in a variety of ways. While many potential issues can cause an unusual noise while you drive, a bad wheel bearing is one possibility.

First, what is a wheel bearing?

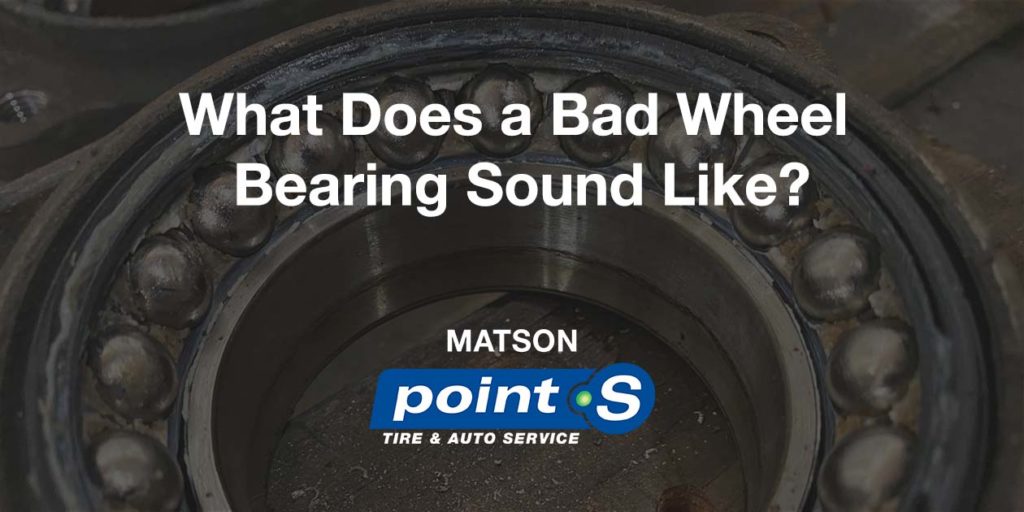
Wheel bearings are a set of steel balls contained in a lubricated metal ring located in the hub. They support the weight of your vehicle and allow the wheels to rotate freely while you drive. In normal conditions, the bearing accomplishes this without making any excessive noise. If the grease lubricant escapes the bearing or debris as water or sand enters it, the bearing will wear out and fail quickly.

inside of a wheel bearing with metal balls

What sound does a bad wheel bearing make?

Being part of the hub assembly, noise caused by a bad wheel bearing will only occur when you are moving. The sound may increase or decrease when you pick up speed or go around a turn. Paying attention to changes in noise or volume when going around corners. These changes can give insight into which side has gone failed. A bad wheel bearing can make any of the following noises depending on the cause or severity of the failure:

  • Humming
  • Grinding
  • Grating
  • Clicking (when turning)
  • Growling
  • Howling

Remember, a bad bearing will make the same noises no matter what road surface you are on. If you hear a noise that changes when you get on a more smooth or more rough road, you might be hearing tire noise.

A bad wheel bearing only makes noise when the car is moving

If the noise you are hearing continues when you come to a stop, it is likely not caused by a bad wheel bearing. To produce noise, the wheels of your car need to be rotating.

That being said, when you are moving, the sound will not cut in or out. If you only hear a noise when you are accelerating, decelerating, or braking, there may be another drivetrain issue.

Can I drive if my wheel bearing is making noise? 

The short answer is no. You should not drive your vehicle if you believe you have bad wheel bearing. The long answer is yes, but with the understanding that driving with a failed or failing wheel bearing can lead to serious safety issues as well as severe damage to your car.

A lot of the time, your car may not feel any different when the bearing is making noise. It’s easy to overlook or put off an issue that is not directly impacting your daily driving.

Your car is not as stable

When the bearing fails and comes apart, it will cause play in the wheel. This can lead to severe instability when driving at high speeds and can come on suddenly if the bearing completely fails while you drive.

The brake pedal can by soft

The brake discs on your car are part of the rotating assembly connected to the hub and wheel bearing. When your wheel bearing has failed to the point of lateral play, the disc will no longer be aligned correctly. This means when you press the pedal, it may feel soft and take longer for your car to stop.

The wheel can come off

This is an extreme case, but if you drive on a bad wheel bearing for long enough, the wheel could come off. If this were to happen on the freeway or at high speeds, it could be catastrophic for you, your car, and other drivers.

Get your wheel bearing replaced at Matson Point S!

When in doubt, bring your car to a technician. When it comes to wheel bearings, it’s better to be safe than sorry. If you aren’t sure whether the sound you are hearing is a bad wheel bearing, the technicians at Matson Point S will take a look and let you know exactly what is wrong with your car. Give us a call or schedule an appointment at our Riverton, Utah location today!

How do I check the oil level in my car?

Without oil, the moving components in your engine will fail. The oil keeps metal components lubricated, reducing friction and dissipating heat. Keeping your engine oil level full will protect it from damage, saving you from expensive repairs and time without your car.

Older cars tend to burn oil due to wear and tear on engine components. The seals and gaskets in old vehicles are more likely to leak oil as well. While the amount of oil lost due to leaks and burning may not be noticeable day to day, over weeks or months it can put your engine at risk of disaster.

Getting in the habit of checking your oil regularly whether you drive an old car or a new one is a good way to gauge the condition of your vehicle and will allow you to provide more information to your mechanic or service advisor when you bring it in to the shop.

When should I check my oil?

The best time to check your oil level is when your car has been shut off for at least 5-10 minutes. Your engine circulates oil through the motor. When you turn your car off after driving it takes time for all the oil to return to the pan at the bottom of the engine. An easy way to get in a routine of checking your oil is to do it when you fill your gas tank.

Get ready to check

When checking your oil, make sure your vehicle is parked on a flat surface and shut off. Put the transmission in park (automatic) or reverse (manual) and make sure the parking brake is engaged. The vast majority of vehicles have a dipstick for checking the engine oil. To access the dipstick, you need to pop the hood. Usually, the hood latch is located on the left side of the driver’s footwell.

How to read the oil level from the dipstick

Once you’ve popped the hood, locate the dipstick (don’t confuse it with the transmission fluid dipstick, which, depending on your engine layout will be coming from either behind the engine or to the right or left of it). Pull the oil dipstick and wipe away the oil with an old rag or cloth. Insert the dipstick back into the tube and pull it out again.

You can now read the dipstick to check the oil level in your engine. The end of the dipstick has markings indicating oil level. Some dipsticks use dots or holes, others use lines indicating full or low. Some will even have “F” or “L” printed on the stick.

Look at where the oil level falls compared to the full and low-level markings. There should be oil present in the space between the bottom and top marks. If the oil level falls near the low line, it is a good idea to add some more to ensure you don’t run out. If your car’s oil level is below the low line, slowly add oil a little bit at a time. Give the new oil a minute or two to settle and check the level again.

Check regularly and keep track of oil levels

If your oil level was low, check it every week after refilling and keep track of the miles you travel. If you notice the oil level decreasing slightly every week, your car may have an oil leak or be burning oil.

My car doesn’t have a dipstick!

Auto manufacturers have been moving away from the dipstick recently. This move follows the trend of making vehicles only serviceable by technicians. If your car does not have a dipstick, the oil level can be accessed by the message center on the dash or infotainment system. Depending on the car, this can be difficult, and it’s best to let a technician check your oil level for you.

If you realize after a few weeks of checking that your car is a losing significant amount of oil, make an appointment with a repair shop.

If your car is losing oil, stop in at Matson Point S!

At Matson Point S, our technicians have the skills and experience to diagnose your oil loss problem. Give us a call or schedule an appointment online today!

Summer Road Trip Prep

You’ve been saving money since the spring, gotten time off from work approved, booked hotels, campsites, and tickets. Your summer road trip is coming up quickly. During preparation, it’s easy to overlook the most essential part of a road trip- the car! If you are about to leave for a big family vacation, it’s important to make sure your vehicle can get you where you need to go, and not break down in the middle of nowhere or an unknown city.

Here are nine things to check, change, and plan before heading out on a road trip this summer.

Oil change

If you are about to go on a long trip, get an oil change before you leave. Fresh oil protects your engine from damage, which is especially important when logging long hours and many miles on the highway. Getting an oil change is not expensive, and also provides you or your technician an opportunity to look under your car for any other issues before you hit the road.

Check tire pressure and tread depth

Having safe tires is extremely important no matter where you are driving. Getting a flat or having a tire blow out on the highway is not only dangerous to you and other drivers, but it will be a major (and expensive) headache while on vacation.

Walk around your car and take a look at the tires. Make sure the sidewalls are free from cracks, bulges, cuts. Next, make sure the tires have adequate tread. Tread depth can be tested with a quarter (the penny test is no longer the most reliable). Insert the quarter with Washington’s head facing down. If the top of his head shows, get new tires before leaving on your trip.

alloy bmw wheel

Lastly, check the pressure of each tire. You can do this with a tire pressure gauge from an auto parts store, and many air compressors at gas stations have gauges built into them. You can find the PSI rating for your tires on the doorjamb of the driver’s door or in your owner’s manual.

Check belts and hoses, and top off other fluids

In addition to fresh oil, making sure your coolant, transmission fluid, power steering, and brake fluid reservoirs are full. If you need to add fluid, make sure you get the factory-recommended product to ensure your car runs and drives correctly.

If you are unsure how to check fluid levels or top them off, have a technician do it for you. Newer vehicles can be confusing under the hood and sometimes it is not clear what fluid goes where.

When you have the hood up, inspect the drive belts. Many components, such as ac compressor and the water pump run off the drive belt. Look for cracking or other signs of wear. Drive belts should be replaced every 60,000 miles.

Make sure you’re A/C works

Nothing is worse than sitting in a hot car, and if you have hours of driving ahead of you, no air conditioning can make it unbearable. If your AC is not blowing as cold as it used to, schedule an appointment with a technician to get it serviced or recharged.

air conditioning vents

Check the brakes 

Go for a drive with the windows down and pay attention to how the brake peddle feels, and any sounds you hear when pressing the peddle. If the peddle vibrates, feels soft or squishy, or you hear a grinding sound when you apply the brakes, bring your car to a certified technician to have them looked at.

Pack an emergency kit

Keeping an emergency kit in your car can help you out if you get stranded or another mishap occurs. Be sure to have basic first aid supplies, non-perishable food, water, a flashlight, jumper cables, basic tools, paper towels, and gloves.

first aid kit

Check or replace wiper blades and washer fluid

Before leaving, make sure your wiper blades work well and the washer fluid reservoir is topped off. If you hit inclement weather on your trip, you don’t want to be hindered by old wiper blades.

Make sure your battery is charged

A strong battery will ensure your car starts every time, and if you are camping and need electricity to charge your phone or use other appliances. Make sure the terminals are clean and free from corrosion and have a technician check the health of your battery.

car battery black

Plan your destinations each day

Pick an end destination for each day of driving. Depending on where you are going, the stops along the way can be as fun as the final destination itself. Planning on an end destination each day you travel will also ensure you aren’t driving when you’re tired.

Planning a big trip? Bring your car or truck to Matson Point S!

Our team of trained technicians will get your car ready for the open road. We can perform all the services and inspections needed to ensure you won’t run into any trouble while you travel. Give us a call or schedule an appointment today!

How Often Should A Boat Impeller Be Replaced?

Most inboard and sterndrive boats utilize a raw water system to cool the engine while it runs. Cold water cycling through the system keeps the engine at a safe operating temperature. Boats use impellers to take in raw water. An impeller is a hub with flexible rubber fins. When the impeller rotates, water is sucked into the cooling system.

Despite being made of rubber, impellers tend to be durable. During operation, water keeps them lubricated and prevents damage. That being said, the potential engine damage from a failed impeller is substantial. Without the impeller, your boat’s engine will overheat.

boat impeller graphic

As a boat owner, it’s important to pay attention to the condition of your impeller. Regular seasonal inspections and replacements can prevent major headaches and expenses down the road.

What causes boat impellers to fail?

Like any moving component, rubber impellers will wear out after years of use. There are a few factors that can speed up impeller failure.

Damaged Boat Impeller

Sandy or muddy water 

If the body of water you take your boat out on is especially muddy or sandy, the life of your impeller can be reduced. Sand particles are abrasive and can quickly wear out the rubber veins of the impeller.

Dry running your boat

Rubber impellers rely on water to keep them lubricated. If your boat runs for even a few minutes (or even seconds) without water flowing through the impeller, it will shred and need to be replaced.

Sitting to long

Rubber becomes brittle and dry rotted if it is sits for too long . If you use your boat infrequently, or if it has been sitting for a few years, the impeller may have become brittle enough to fail on initial startup.

What happens when the impeller fails?

If the impeller on your boat breaks or fails, the resulting damage can destroy your engine. Without a constant supply of cold water, the engine will quickly overheat. When an engine overheats, damage to the head gasket, cylinders, and the engine block is possible. Severe damage may require an engine replacement.

How often should a boat impeller be changed?

Even if no abnormal damage is caused to the impeller, it should still be replaced on a regular schedule. Depending on how much you use your boat, impeller replacement should be done based on either hour of operation or years.

At Matson Point S, we recommend an impeller replacement every 100 hours of operation. It can take a long time to clock 100 hours, so we also recommend that the impeller is replaced every other year for the majority of outboards and sterndrives.

The one exception to this rule would be MerCruiser systems. The design of these units extends the life of impellers. MerCruiser impellers should be replaced every three years.

Let Matson Auto and Marine replace your impeller

Impellers are an inexpensive component. Staying on top of this boat service can save you thousands of dollars down the road. Our team of boat technicians has the skills and experience needed to service your boat. If it’s time for a new impeller, give Matson Auto and Marine a call today or schedule an appointment online!

How to Get Your Boat Ready for Summer

As a boat owner, when the weather starts to get warm in the spring, you get excited. Pretty soon you’ll be spending your weekends on the water, but before you can do that, you have to get your boat ready for the season. In the fall, you winterized your boat and put it up for the winter. You changed the oil, flushed the cooling system and filled it with antifreeze, prepped the fresh water and sewage systems, and if you have an outboard or sterndrive, you greased the moving components in the lower unit. Your boat has been sitting all winter, and before you get it out on the water, there are a few boxes you need to check. Read on to learn about spring/summer boat preparation.

Visually inspect your boat

When your boat first comes out of storage, performing a visual inspection is a good idea. If the boat was stored outside, check the exterior for damage caused by weather and other debris. If you live in an area that sees heavy snowfall, make sure your boat has no structural damage from the weight of snow piling up on it.

For boats stored both indoors and outdoors, it’s a good idea to check the interior for signs of mice. Take a look at all visible wires. If you notice any damage or chewed wires, mice probably moved in during the cold months.

Check and charge batteries

Whether you took the batteries out of your boat or left them in for storage, it’s important to make sure they are charged and working properly. You wouldn’t want to end up stranded on your first trip out of the season. Make sure the terminals are not damaged and the plastic casing isn’t cracked.

Marine Battery

Check the engine and drive

When you winterized your boat, you most likely performed an oil change. Before you take your boat out for the first time, check your engine oil levels, and if you did not change your oil in the fall, be sure to perform one.

If you have a sterndrive boat or outboard motor, check the gear lube levels in the drive to ensure proper lubrication during operation.

Mercury Lower Unit

Prepare the water system

If your boat has a freshwater tank that supplies a shower, sink, or toilet, it’s important to flush out the antifreeze that was added when you put it up for winter.

  • Start by flushing the antifreeze from the holding tank by running fresh water through the system.
  • Make a bleach solution and run it through the freshwater system so it’s safe to drink from.

Start the engine

Making sure your boat is in good working order mechanically before the summer season is a smart idea. Whenever you start your boat out of the water, make sure you are using engine muffs or another form of water supply to keep your boat engine from overheating. Check all gauges and make sure they are working while the engine is running.

Check your trailer

Even if you dock your boat on the water during the summer, you’ll still need to trailer it at the beginning and end of the season. Make sure you inspect your boat trailer before towing. Make sure the trailer tires are in good condition, the brakes work, and brake lights/turn signals are functioning as they should.

Inboard Mastercraft boat

Other boat summarizing tips

The steps above are essential when getting your boat ready for summer, but there are a lot of optional preparations you can do to protect your boat and make your life easier.

Interior and exterior detailing

The inside of your boat likely collected debris while sitting all winter. Giving the inside a thorough wash will make it a much nicer place to spend time.

Washing and waxing the exterior of your boat every spring will help protect it from the elements, whether you trailer it to the lake every time or dock it for the summer.

Equipment and supplies

Make sure your boat has the essentials on board. It’s a good idea to bring:

  • Ropes and bumpers
  • Life vests
  • Fire extinguisher
  • Tool kit
  • Drinking water
  • Nonperishable food

Make sure you have all registration and insurance documentation on board as well.

Life vest and towel on dock

Let Matson Auto and Marine help with your boat!

If you’re unsure about any step in the boat summarizing process, call or schedule an appointment at Matson Auto and Marine! Our marine technicians serve Utah boat owners at our Riverton repair shop. We have the expertise needed to get your boat prepped and ready for a summer on the water!

Copyright 2022 | Matson Auto

Website By Automatic Digital Marketing