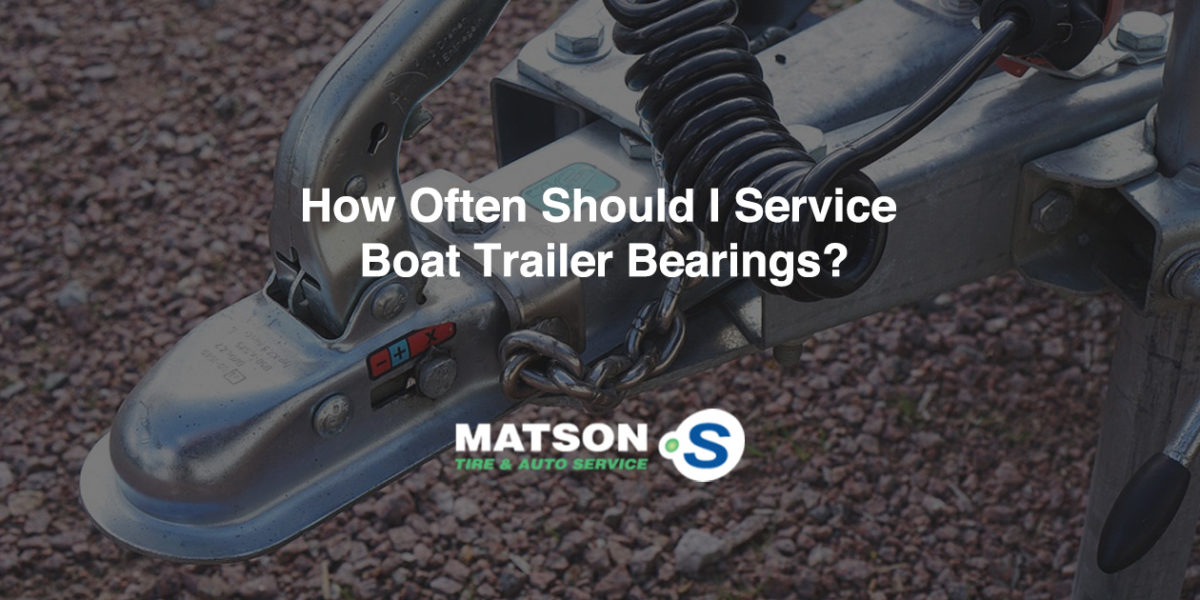
Outside temperature can have a significant impact on tire pressure. When it’s cold out, the pressure can decrease so much that you get a tire pressure warning light. In this article, we will go over why and how temperature affects tire pressure, and what you can do to keep your tires properly inflated.
How Does Temperature Impact Tire Pressure?
Cold air takes up less volume than hot air. When it’s cold out, you can expect a 1-2 PSI drop for every 10 degrees the temperature goes down.
When the temperature is warm, air expands and takes up more volume. The
air pressure in your tires will increase by 1-2 PSI for every 10 degrees the temperature goes up.
How to Deal with Temperature-Related Low Tire Pressure
Regularly checking your tire pressure and adding air as needed is the best way to prevent underinflated tires, regardless of the outside temperature.
Check Tire Pressure Regularly
Tire pressure gauges are inexpensive and are available at most auto parts stores. Checking tire pressure is easy. Simply remove the valve stem cap on the wheel and place the gauge on the end of the valve. Depending on the style of the gauge, you will get a digital or analog readout telling you the air pressure in your tire.
The best time to check the pressure is when the tires are cold. Driving heats up the air in your tires, and as we learned above, hot air takes up more volume.
Tire pressure will increase around one PSI every five minutes for the first 15-20 minutes you are on the road. Wait at least two to three hours after driving before checking tire pressure.
Add Air When Necessary
Most people do not have a way to add air to their tires at home. Given that the air pressure in your tires will change while you drive, you should write down the reading you got when the tires were cold. When you get to a gas station or service center, add air to the tires based on the cold reading.
How Much Air Pressure Do My Tires Need?
If you are unsure what PSI your tires should be, you can find this information on a panel or sticker on the driver’s door jamb. Add air and re-check until the tires are at the recommended PSI.
Is it Bad to Drive on Underinflated Tires?
Yes! Driving on underinflated tires can lead to poor handling, faster tread wear, and reduced fuel economy.
Tire Service at Matson Point S
While temperature impacts tire pressure, if you are topping off a tire multiple times a month, a leak or puncture may be to blame. You can trust Matson Point S for all your tire needs, from flat repair to tire replacement. Give us a call or schedule an appointment at our shop in Riverton, Utah today!
Most of the time, when you are shopping for new tires, the service advisory you are speaking to can pull up your information and easily tell you the size of the tires on your car. Unless you are an enthusiast or buy your tires online, you probably haven’t given tire size much thought. That being said, you may run into a situation, like getting a flat, where you need to know your tire size. Finding this information is easy as long as you know where to look and what to look for. In this guide, we are going to tell you how to figure out the size of your tires quickly and easily when they are on your car!
Where Can I Find My Tire Size?
Sizing information is found on the sidewall of your tire. It will be presented as a series of numbers and letters, typically presented in the following format: P235/45R 17. You may see another number and letter combination after this, which represents the tire speed and load rating that we cover in a separate article.
How Do I Read Tire Sizing?
Providing this number to a professional will be all the information they need to find the right tires for your car. You don’t need to know what each number means, but if you are curious, keep reading and we will cover what these numbers mean next.
How are Tires Sized?
Tire sizing is split into three categories, each describing a different part of the tire’s dimensions. The categories are width, aspect ratio (A/R), and wheel diameter. We are going to break down what each category stands for below.
Tire Width
The first number is the width of the tread, which is the part of the tire that contacts the road. In the above example size, “235” means that the tire has a width of 235 millimeters.
Tire Aspect Ratio (A/R)
The second number represents the aspect ratio or the height of the sidewall. The sidewall is measured as a percentage of the tread width. In the above example, the number 35 after the slash means the tire’s sidewall height is 35% of the tread width. A lower aspect ratio correlates with a lower profile tire.
Wheel Diameter
The final number in the sequence represents the diameter of the wheel the tire is mounted on in inches. In the above example tire, the 17 indicates the tire fits on a 17-inch wheel.
What Do the Letters Mean?
You probably noticed the letters mixed into the size numbers. The first letter represents tire type, and the second number indicates the construction.
Tire Type
The very first letter(s) in the tire sizing represents the intended market and vehicle type for the tire. In the above example, P stands for P-Metric, which means the tire meets passenger car standards in the United States.
If you see “LT”, the tire is intended for use on light trucks and will often have higher pressure requirements than P-rated tires.
If a size rating has no starting letter, it is a European Metric tire. There are some differences in load capacity between European and P-Metric tires.
Tire Construction
Unless you are dealing with trailer tires, you will almost only see an “R”, which stands for radial construction. This article goes over the other types of tire construction out there.
Matson Point S is Your Source for Tires!
Our tire shop in Riverton is ready to help you with your next tire purchase, no matter the size! In addition to tires, we offer full-service auto repair and maintenance. Whatever your automotive needs, the team at Matson Point S will keep you moving. Call or schedule an appointment online today!
There are few things worse than a flat tire. Getting a flat is something nearly everyone who drives has experienced and knowing how to change it is an essential skill for any driver. Changing a flat tire may sound simple and to some people who have done it before, it is. Fear not, even if you haven’t changed a flat before, it’s a very easy job that just about anyone can do. That being said, some steps need to be followed to keep you safe while doing it.
In this article, we are going to go over how to change a flat tire safely, so you have the know-how next time it happens to you!
Tools Needed For Changing a Flat
To change a flat tire, you will need at a minimum a jack, your spare tire, a lug wrench, and your owner’s manual. Nearly all vehicles come with these items. Spare tires can be found under the carpet in the trunk, hanging on the back, or bolted to the underside of your vehicle. The wrench and jack will typically be stored in the trunk or rear of the car as well. You can find your owner’s manual in the glove box.
Other Useful Items
In addition to the tools listed above, there are a few other things that can make changing a flat tire easier.
Poncho or raincoat for working in bad weather
A tarp to kneel on while changing the flat
A block of wood to secure the jack
Flashlight for working in the dark
Gloves
Wheel Chocks
None of these items are needed for changing a flat, but they will make the job a lot easier, especially if you are working at night, in the cold, or the rain or snow.
It’s a good idea to make sure you have all the required tools in your car at all times. If you bought a used car, make sure to check that at a minimum, there is a spare tire, a jack, and a lug wrench. Without these items, you will not be able to change a flat tire.
How To Change a Flat Tire
Follow these steps to safely change your flat tire and get back on the road!
1.) Find a Safe Parking Place
If you wake up to a flat tire in your driveway, this isn’t a huge concern. If you suddenly get a flat while driving, especially on a highway or interstate, it can be difficult to find a safe place to pull over. Ideally, find a pull-off, parking lot, or rest area where you can get away from traffic. Remember, you will be on the ground when changing your flat. Being right next to speed traffic is extremely dangerous.
In addition to moving away from the road, make sure you park in a flat area. Ideally, you should change your flat on a paved surface to prevent the jack from shifting.
2.) Secure Your Vehicle
Before getting out of your car, engage the E-Brake, and put the transmission in park (automatic) or reverse (stick shift). You do not want your car to move when has been lifted on the jack. If you have them, placing wheel chocks behind the wheels touching the ground will add an extra layer of security while you change the tire. Turn on your hazard lights to let other drivers know they should slow down.
3.) How to Remove a Flat Tire
Now that you have your tools ready and your car is safely secured, you need to remove the flat tire before putting the spare on. Follow these steps to get the flat off your car safely. Just to clarify, you will be removing the entire wheel and tire.
4.) Uncover and Locate the Lug Nuts
Some vehicles have hubcaps covering the lug nuts, and some do not. If you have hub caps, carefully remove them. A flat head screwdriver can come in handy for removing hubcaps.
5.) Loosen the Lug Nuts
Before jacking up the vehicle, loosen the lug nuts with your wrench. It can be difficult to break them loose. If you are having trouble, you can use your bodyweight or foot to apply extra pressure. At this point, you just want to break them loose. Don’t worry about removing them yet.
6.) Position the Jack Under the Car
Place the jack on a stable, flat surface. If you have to change a flat on a dirt road, placing a block of wood under the jack can help secure it. Most cars have specific lift points along with the frame for the jack. Reference your service manual if you are having trouble locating the jack points.
7.) Jack the Car Up
Carefully, begin to jack up the car. DO NOT put any part of your body beneath the car when it is jacked up. Jack the vehicle up until the flat tire is six inches off the ground. Having at least six inches of clearance will ensure the spare tire, which will be fully inflated, clears the ground when you put it on.
8.) Remove the Lugs
Depending on your vehicle, the wheel will be attached with either lug nuts or lug bolts. Lug nuts unscrew from studs that support the wheel, while lug bolts pass through the wheel into the hub. If you have lug bolts, be careful when removing them, the tire can drop suddenly when the last one comes out.
9.) Take the Flat Tire Off
With the lugs removed, it’s time to take the flat tire off. The easiest way to do this is to grip the tread and slowly pull out. If the wheel is stuck to the hub, wiggling from side to side can help break it loose. Once it’s off, lay the wheel flat on the ground so it doesn’t roll away.
10.) Install the Spare Tire
Now that the flat has been removed, it’s time to put the spare on! If your car uses lug nuts and studs, simply slide the spare into place and hand tighten the nuts.
If you have lug bolts, it can be a bit tricky to get the spare on. Line the bolt holes up with the holes in the hub and carefully thread one of the bolts to hold it in place. Next, thread a bolt on the opposite side so the wheel sits flush with the hub. Now that it’s in place, you can thread the other bolts to hand tight.
11.) Return the Car to the Ground and Tighten the Lugs
With the lug’s hand tightened, slowly lower the vehicle on the jack until all four wheels are on the ground, but the spare is not supporting the weight on its own. Grab your wrench again and tighten the lug clockwise as far as you can go.
12.) Lower the Vehicle Entirely and Remove the Jack
Lower the vehicle to the ground and remove the jack. Give the lugs a final tightening to make sure they are as tight as they can be. Replace the hubcap (if applicable on the spare).
13.) Store Tools and Flat Tire
Return the tools to their storage locations within your car and put your flat tire where you found the spare.
14.) Check Spare Tread and Pressure
Once the spare is on the car, check the tire pressure with a hand-held gauge or at a nearby gas station. Additionally, make sure there is adequate tread on the spare.
You’re done! Now you can drive to a tire shop and get a new tire or have the flat repaired.
Types of Spare Tire and Driving Safety
Depending on what type of spare tire your vehicle has, you may need to adjust your driving. A lot of modern vehicles come with very skinny, lightweight spare tires called “donuts”. This type of spare is only good for around 50 MPH and a limited number of miles. The wheel and tire itself will have warnings on them if you need to drive slower.
If you have a full-sized spare, you can generally drive normally. Keep in mind, if you have an all-wheel-drive vehicle and your spare has significantly more or less tread than the other tires, you can cause damage to the drivetrain over time.
Tire Repair and Replacement at Matson Point S
Knowing how to change a flat tire is an important skill to have, but you will still need a professional to fix your flat or replace it together. Matson Point S is your source for all things tires. Our Riverton repair shop provides Salt Lake Valley with auto repair, tires, marine service, and more. If you need a tire replacement or flat repair, don’t hesitate to give us a call or schedule an appointment online today!
When you turn on the heat in your car on a cold morning, you expect to feel hot air coming through the vents once the engine is up to temperature. The heater core is the reason your heat works. The heater core utilizes hot coolant from the engine to warm the cabin, keeping you comfortable while you drive no matter how cold it is outside.
If your repair shop tells you, it’s time for a new heater core, your first question will probably be how much will it cost? In this article, we are going to go over what’s involved with this repair and the ballpark cost of what you can expect to pay.
What is a Heater Core?
The heater core looks like a miniature radiator buried deep in the dashboard. Hot coolant flows through passages in the core from the engine. In the dash, a fan blows air over the heater core. The hot air passes through the vents into the cabin, warming you and your passengers as you drive. The heater core is a component of the coolant circulation system. This means issues with the heater core can potentially impact other areas of your car, including the engine.
How Do They Fail?
Like we said before, heater cores do not fail all that often. Age and neglect make them more likely to have problems.
Leaking Heater Core
A leaking heater core can cause some significant issues. First, coolant will leak in the dash. Leaking coolant can form puddles in the footwells and make the entire cabin smell. Second, the air coming through the vents will not be as hot as you are used to. Third, any time coolant is leaking out of the system, you run the risk of overheating your engine. Overheating can lead to serious damage and very expensive repairs.
Several things can cause a heater core to leak. Plastic end tanks on the core can rot out or crack. This is especially true on older vehicles that have been driven for many years. Additionally, vibration from engine operation can make the welds on the core come undone.
Clogged Heater Core
Heater cores can become clogged as they age, particularly if coolant flushes have been neglected. Debris and other particles block coolant passages within the core and can cause it to leak. Electrolysis, which happens when there is an excessive electrical current in the cooling system, can lead to buildup in the heater core, causing a clog.
Is It Expensive to replace a heater core?
This repair can be expensive. The cost of the job can be broken into two sections: parts, and labor. We are going to look into the costs of both sections to give you an idea of what you can expect to pay.
How Much Does a Heater Core Cost?
Like any part, the price depends on your vehicle. On some cars and trucks, it’s possible to replace just the core. Other heater cores are integrated into larger components within the dash. At the low end, heater cores start at around $100. You can expect to pay lower prices on inexpensive economy cars. At the high end, parts prices for a heater core can be closer to $1000. Luxury cars and SUVs generally have more expensive parts.
The best way to know how much the part will cost is to talk to a service advisor at your favorite repair shop, but a quick search online can also provide you with a price range.
Heater Core Replacement Labor Cost
The most expensive part of replacing a heater core is the labor. Labor charges pay the technician for the work required to complete the repair. Accessing the heater core is the most time-consuming part of this repair. In some cases, the entire dashboard must come out to access it.
The time to replace a heater core varies significantly from car to car. Most vehicles require five to seven hours to complete the repair, but some take as long as 15 hours. Labor rates also vary from shop to shop but expect labor fees to start around $500 to $600 for most cars. Others may cost as much as $1200 to $1500.
Total Cost of a Heater Core Replacement
There’s no way to put an exact number on the cost of this repair with such wide variability in price, labor times, and shop labor rates. If your heater core needs to be replaced, you should plan on, at the bare minimum, $800-$1000. The price can quickly shoot up if your car requires a lot more time to get to the core, or if the parts are particularly expensive, closer to $1800-$2000.
Can I Replace a Heater Core Myself?
It’s unlikely you will be able to replace a heater core on your own without lots of experience working on cars, ample space, time, and tools. This repair is in-depth, requiring lots of disassembly. Heater core replacements are best left to a professional, so you know the job is done right.
Heater Core Replacement at Matson Point S
If your heater core is leaking or clogged, don’t delay getting it replaced. Our team of skilled technicians will perform the repair right the first time and get the heat flowing through your vents again. Give us a call or schedule an appointment at our Riverton, UT auto repair shop today!
Getting an oil change is essential for proper engine functioning and maintenance. Fresh oil provides proper lubrication to moving components, preventing wear and tear as you drive. Depending on how much you drive and the age of your vehicle, you probably get between one and three oil changes per year. You might be wondering, how much should I be paying for an oil service?
Oil Change Components
An oil service doesn’t vary all that much in terms of supplies and procedure. When you get an oil change, you are paying for labor, new oil, and a new oil filter.
Oil
Oil brand and type (synthetic, synthetic blend, or conventional) can impact the price, with a full synthetic oil change generally being more expensive.
Another factor that can impact prices is the size of your engine. A lot of shops will advertise a flat rate for an oil change up to five quarts. If you drive a car with a large oil capacity, the cost will be more. This is simply due to the amount of oil required to fill your engine.
Oil Filter
There are a few different varieties of oil filters, screw on and cartridge. Conventional screw-on filters (when you think of an oil filter, this is probably what you imagine) are generally less expensive.
Screw-on oil filter
Many modern vehicles use cartridge filters, which sit inside of a housing. This variety will typically cost more.
Cartridge oil filter
Your repair shop will know the type of oil filter your car needs.
Oil Change Cost
You may have seen varying prices advertised at different shops. Some shops offer extremely cheap oil services, under $50. Other shops may charge $100 or more. What gives?
Quality Parts
Typically, places that offer low-cost oil services are using lower-quality filters. Lower quality filters do not offer the same protection as an OEM (original equipment manufacturer) quality one. While it’s better than nothing, you are getting what you pay for.
Courtesy Inspection
An oil service at Matson Point S includes a courtesy inspection of your vehicle. We can’t say this is the case at every shop that charges more for an oil change, but typically, if you are paying a higher price your car will get looked over.
Experience
Getting an oil change at a reputable shop that charges a bit more money typically means the technicians working on your car are experienced and have a knowledge of vehicles beyond a standard lube tech. This means mistakes are less likely to happen. We have seen instances, particularly on more complicated European vehicles, where simple mistakes during an oil service have led to at best, a car needing to be towed to another shop to be completed, or at worst needing an engine replacement.
How Much Should You Pay for an Oil Change?
Ultimately, it’s up to you. A $35-$60 oil change will get you oil and a new filter, but the filter may not be OEM quality. Additionally, you probably won’t be getting a courtesy inspection, and you run the risk of mistakes being made by less experienced technicians.
Oil Changes at Matson Point S
An oil change at Matson Point S will get you OEM quality parts, fluids, and a courtesy inspection performed by ASE-certified technicians with years of experience. We serve the communities in and around Riverton, Utah. Give us a call or schedule an appointment online today!