Symptoms of Old Transmission Fluid: How Often Should It Be Changed?

Transmission fluid, and maintenance, are overlooked. Other fluids in your vehicle, like oil and brake fluid, get all the attention and as a result, get serviced more regularly. Transmission fluid is just as essential to the health and usability of your car or truck. 

It’s not uncommon for car owners to completely ignore transmission fluid services. While it is true that transmission fluid does not need to be changed nearly as often as engine oil or brake fluid, neglecting it for too long can result in some expensive repairs. 

Outside the recommended intervals, there are some things to keep an eye out for that might indicate it’s time to get some fresh fluid in your vehicle’s transmission. Keep on reading to learn about some common symptoms of bad/old trans fluid!
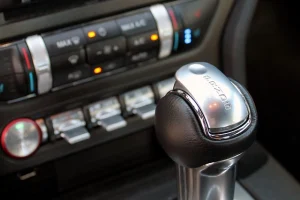
Ford Mustang automatic transmission shifter

What is Transmission Fluid?

Transmission fluid lives inside the case of the transmission, much like oil lives inside the engine. Transmission fluid varies depending on the vehicle, manufacturer, and type of gearbox. 

Automatic transmissions use a fluid referred to as ATF. Older manual transmission cars utilize a heavier-weight gear lube, but some modern manuals use an ATF as well. 

Other technologies like CVT (continuously variable transmission) or DCT (dual-clutch transmission) use highly specialized fluids. There is no standard rule for what transmission fluid to use. You should always consult your owner’s manual or ask your service advisor. 

What Does Transmission Fluid Do?

Transmissions have loads of moving metal parts. Without a lubricant, these parts would grind against each other and wear down extremely quickly, generating immense amounts of heat. In all cases, transmission fluid keeps the gearbox lubricated and cool. 

ATF also acts as a hydraulic fluid, and assists in gear changes. The pressure and friction created by the hydraulic fluid make switching gears much easier. 

The final purpose is cooling. The fluid absorbs heat from the transmission as it circulates through the system. Eventually, the fluid reaches the transmission cooler, which cools it and in turn, the transmission. This process happens over and over to ensure the proper temperature for your transmission. 

How Often Should You Change Your Transmission Fluid

The period between changes varies heavily depending on the make and model. Some modern cars use a lifelong transmission fluid that according to the manufacturer, never needs to be changed. While this fluid will last a long time, it’s still vital to check and change it if needed, especially if using the vehicle for any hard driving or towing. 

For cars with fluid that needs to be changed, the intervals can vary. In general, service intervals can range from anywhere between 30,000-100,000 miles. You should periodically check your transmission fluid for contamination if you allow it to run close to the recommended maximum mileage. More frequent fluid changes are recommended for higher mileage vehicles.

Symptoms of Old Transmission Fluid

Neglecting to flush your transmission regularly can lead to some pretty noticeable symptoms. 

Dirty Transmission Fluid

One of the easiest ways to see if you should replace your fluid is to look at it. Contaminated or old transmission fluid will be a dark brown or black color. The darker the fluid, the more critical it is that you replace it. The fluid may also have a burnt smell. 

ATF fluid is red when new, and will become a darker red as it’s used in the transmission. These colors are normal and signify fluid that’s still okay to run in your vehicle.

Manual transmission fluid for older manuals is golden/amber in color, similar to motor oil. It will also become darker and dirtier with age. 

Engine Running Hot

It may be counterintuitive to think that your engine would be reaching high temperatures due to your transmission, but it’s possible! When the transmission fluid can’t flow as it should, the gearbox is unable to cool itself. The transmission will build up excess heat through friction if the fluid is not lubricating like it should, and since it’s connected to the engine, will transfer the heat to it. While there are many other reasons your engine could be running hot that should be looked at first, it may be worth checking your transmission fluid.

Grinding Transmission

When transmission fluid degrades and becomes contaminated, it loses its lubricating properties. Moving parts will start to grind against each other and can cause some very unnerving noises. If you hear any similar noises, it may be time for a transmission fluid change. 

Transmission Slipping

As transmission fluid becomes worn out, it can impact how your transmission shifts. A reduction in hydraulic pressure causes the transmission to struggle when holding the car in a certain gear and can allow the transmission to slip back into another gear. Slipping can be a symptom of more severe mechanical issues, but in some situations changing the transmission fluid will help. 

Surging Transmission

If your vehicle “surges” or jolts forward every so often, it may be a product of old and dirty transmission fluid. Similar to when gears slip, the fluid isn’t able to flow at the rate it needs to which causes it to get stuck at certain points. This causes inconsistency in the power delivery and occasional surges that send your car lurching forward. 

Transmission Fluid Service at Matson Point S

If you’re experiencing any symptoms similar to these, it’s best to bring your vehicle to a professional to service it. Driving with old transmission fluid can be harmful to your car’s health in the long run, and catching issues early can save you a lot of money.

Luckily, Matson Point S in Riverton, Utah is your resource for transmission service and fluid changes. Our experienced technicians will ensure your transmission is healthy. Call or schedule online today to meet with our friendly team!

Why Do Ford Triton Engines Blow Out Spark Plugs?

Ford’s modular engine platform of the 1990s and 2000s was the catalyst for some of the most powerful and widely used gasoline V8 and V10 engines of the day. One of these engines that came as a result of the modular platform was the 5.4 Triton, a V8 that Ford used primarily in trucks. Variations of it also appeared in legendary cars such as the Ford GT500, Ford Mustang Cobra R, and the Ford GT in a modified form. 

2002 Ford Explorer

One of the common issues of the modular platform was its tendency to blow out spark plugs. This issue happened the most on the 5.4 Triton from 1997 to 2003. During this era, the motor commonly powered the F-Series pickups, E-Series vans, and the Expeditions/Navigators. The engines built past that point were much less susceptible to the problem, but are still known to have the issue in some instances. 

During driving, the spark plugs could eject themselves from the engine. This can cause major damage to the cylinder head and spark plug port threads, and leave the driver stranded with an expensive repair. 

Why Did the Spark Plugs Blow Out?

The problem stems from the threads themselves. The spark plugs Ford used on these engines didn’t have enough threads, and the threads they did have were soft and weak, meaning that the pressure from the combustion was able to blow the plugs out of the engine. Ford later tried to remedy this issue by adding more threads, but there have been instances of post-’03 Tritons blowing out their spark plugs as well.  

Factory worker installing Triton motor

What Can I Do to Prevent It?

While there hasn’t been much evidence one way or another, Ford does recommend sticking with Ford Motorcraft brand spark plugs during replacement, but the issue has still been commonly seen in the trucks that come with OEM Ford plugs from the factory. 

The best way to avoid it is just regular spark plug service and commonly checking the torquing of the plugs, as loose spark plugs accelerate the issue.

Ford recommends a method of repair for the cylinder head that prevents the issue in the future, but this can only be done if the problem has already happened. 

When Should I Service my Triton’s Spark Plugs?

Ford recommends spark plug service for 5.4 Tritons around the 100,000-mile mark, but checking the torque specs of the plugs most frequently can help prevent the ejection issue. 

The spark plugs on Triton motors post ‘03 can be more troublesome than their infamous predecessors during service. The 2-piece design was supposed to alleviate previous issues, but this led to carbon build-up in the gap between the plug and the cylinder head causing the plugs to often break when being removed. These broken plugs would then be stuck in the cylinder head and be extremely difficult to get out.

Because of this, spark plug service for the Tritons from 2004-2008 should be done more frequently. This gives the carbon less time to build up and cause problems. 

Spark Plug Service at Matson Point S

If you’re looking to buy a Triton powered vehicle, we recommend taking it to a professional for a pre-purchase inspection to make sure your new truck doesn’t send a spark plug flying. If you own one already, regular service and torquing of your plugs are essential to keeping it on the road.

Luckily, Matson Point S in Riverton, Utah has you covered! Our ASE-certified technicians have many years of experience working on Ford engines and can service or inspect them to the highest quality.

Call or schedule an appointment online today to meet with our team and keep your vehicle running healthy!

What are the Symptoms of a Leaking Valve Cover Gasket?


The many gaskets we have in our cars are a small but essential piece in keeping the vehicle running safely and smoothly. There are gaskets in nearly every system within the engine, all working to keep essential fluids like oil where they should be.

Keeping oil in the engine is just as important as having oil in the first place, and that wouldn’t be possible without silicone and rubber gaskets. Metal on metal connections do not form a proper seal, and would allow oil to seep out of where it needs to be.


What Does the Valve Cover Gasket Do?


The valve cover protects some of the most vital and carefully calibrated parts of your vehicle, and keeps the high pressure oil there to lubricate it all. The valve cover gasket is exactly what it sounds like, a gasket for the valve cover. It essentially maintains the seal between the valve cover and the cylinder head, and prevents oil from escaping. 

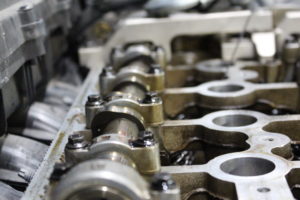
Cylinder head and engine internals without valve cover

The gasket is usually made of silicone, rubber, or cork and provides a cushion for the seal. With use though, the gasket is gradually worn down by the oil and heat and can eventually no longer properly serve its purpose. 


What Happens When the Gasket Goes Bad?


As oil starts to leave the system, there are a host of issues that can come up. As your engine loses oil, the wear on internal components increases.. Low oil levels can lead to catastrophic problems for your engine, and despite a gasket replacement costing a little upfront, it’ll save massive headaches for you and your wallet down the line.


How do I know if my valve cover gasket is bad?


A bad valve cover gasket has multiple different symptoms, some that are similar to other issues with your engine and some that are unique to the specific gasket. Some of the symptoms that can be signs of a bad gasket include:


Visible Oil Leaks 


When oil is able to escape, it’ll often leak onto different parts of the engine that may be visible when you pop your hood. Other times, it can drip all the way to the ground and you’ll be left with a blackish brown stain on your driveway under the engine bay. Keep an eye out for these leaks, as having an engine soaked in oil is a good indicator that something isn’t right. 


Low Engine Oil


With an oil leak comes the accompanying low oil light. If you have an oil light illuminated on your dash or suspect low oil, shut off your car and check your dipstick, as running with low oil can be harmful for your engine even in short periods of time. If you know you have low oil, top off your engine immediately and bring your car to an expert


Smell of Burning Oil


Often when oil is leaking from the valve cover, it can drip onto extremely hot parts in your engine such as the exhaust pipes or engine block. If you smell burning oil it means your engine is losing oil, and may have or will soon reach dangerously low levels. If you smell this distinct smell, make sure to take it into a service shop to locate and fix the source of the leak. 


Misfires


With a bad gasket, the oil is able to leak into the spark plug wells and eventually soak the spark plugs. This can result in your engine misfiring, which is the failure of a cylinder to ignite during the engine’s cycle. Misfires will result in reduced performance, and the spark plugs will need to be replaced. In serious cases, misfires can even lead to engine fires. It’s important to look for misfire codes on your dash, and take your car in for service as soon as you see one. In severe instances, you might see your check engine light blinking repeatedly. You should pull over immediately and have your car towed to a professional, as driving with a severe misfire can cause extremely expensive damage to your catalytic converters. 

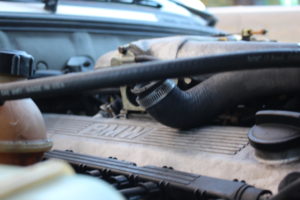
Valve cover inside engine bay

Valve Cover Gasket Service at Matson Point S


If you suspect a problem with your valve cover gasket, or any other gaskets for that matter, Matson Point S has you covered at our Riverton repair shop. Our experienced and certified technicians will make sure your car is all buttoned up so it can spend more time on the road and not in the shop. Call or schedule an appointment online with us today!

Common Problems with Nissan CVT Transmissions

The CVT (Continuously Variable Transmission) is a technological innovation meant to create a smoother and more fuel-efficient experience than a traditional automatic. By eliminating gears, CVTs allow the engine to operate at the most efficient rpm.

While the concept of CVTs are good, in practice they were often plagued with issues. This is particularly true for Nissan, which employed CVT gearboxes across its lineup. These transmissions ran into countless issues and were so poorly designed that a class action lawsuit was filed against Nissan. If you are curious about why Nissan’s CVTs are so unreliable, read on to learn more!

What is a CVT?

CVT, which stands for Continuously Variable Transmission, is a type of automatic transmission that uses a belt and pulleys to create an infinite number of gear ratios. With the ability to adjust the gear ratio on the fly, the engine can operate in the most efficient range, regardless of how fast the vehicle moves.

One pulley receives power directly from the engine, while the other sends power to the wheels. Like a traditional automatic, CVTs use a torque converter between the engine and transmission and also use a shifter to engage and drive/lock the transmission at a specific ratio.

Hydraulic pressure actuates the pulleys, allowing them to move between overdrive and underdrive positions and anywhere between.

Nissan CVT Problems

Any time there’s a transmission issue, you will notice it. Whether it’s a new smell, sound, or change in the way your car drives, it’s generally pretty easy to tell when something is wrong. Nissan CVT issues had several symptoms, which will be highlighted below.

Shuddering Transmission

Often referred to as “the judder”, this issue occurs when the belt or pulleys begin to wear out, which would happen far more quickly than it should have on these transmissions. When the components wear out, the steel belt will slip.

Nissan offered a software update to the Transmission Control Module (TCM) that would help technicians diagnose the juddering issue. Two “judder codes” could be triggered and stored in the TCM:

  • P17F0: Replace the Entire CVT
  • P17F1: The technician should inspect the CVT belt before replacing the unit. Replacing the valve body could fix the issue. 

Grinding or Whining Sounds

Another commonly reported issue with Nissan CVT gearboxes is a whining or grinding sound while driving, which can change depending on how fast you are driving. Typically, these sounds are the result of a worn bearing, but they could also be the result of a problem with the CVT belt.

Overheating, Burning Smell, and Limp Mode

The third main issue that plagued Nissan CVTs is overheating. This problem normally occurs when traveling long distances at highway speed or when putting the transmission under a lot of load, such as going up a steep hill.

When the transmission overheats, it can produce a noticeable burning smell while you drive. A bigger problem though is high transmission temperatures sending the vehicle into limp mode. The cooling system on the CVT cannot handle the amount of heat generated by the belts and pulleys.

As a solution, Nissan offered an external transmission cooler upgrade, but even that did not always help. The entire unit may need to be replaced.

How to Prevent Nissan CVT Issues

Due to the underlining design flaws of this transmission, there is no surefire way to prevent problems. With that said, following a strict, routine service schedule can reduce the likelihood of running into issues. Regular inspection and transmission fluid flushes make a big difference in the longevity of any transmission, CVTs included.

CVT Service at Matson Point S

If you need help with your problematic Nissan CVT transmission, come on into Matson Point S! Our Riverton auto repair shop is staffed with skilled and experienced technicians that know the ins and outs of CVTs and can help you figure out the best path to getting your car running as it should again. Call or schedule an appointment online today!


How Often Should I Service Boat Trailer Bearings?

It can be easy to overlook servicing your boat trailer. Other than the lights, brakes, and tires you may not give it much thought. One of the most important components on your boat trailer, the wheel bearings, should be on your list of regular maintenance items. Bearing failure can prevent you from trailering your boat or leave you stranded on the side of the road. 

Boat trailer bearings require more frequent maintenance than those found on a regular trailer due to water exposure. 

In this article, you will learn about the importance of proper boat trailer bearing maintenance, and how to perform the service at home!

How Often Should I Grease Boat Trailer Bearings?

There isn’t a hard and fast rule on how often you should service the bearings. The way you use your trailer impacts how frequently you should service the bearings.

If you trailer your boat to and from the water every time you go out, the bearings are exposed to water a lot more frequently. If you don’t keep your boat at a marina all summer, you should service your bearings a minimum of once a year.

If you go out infrequently or keep you boat at a marina, you can probably get away with servicing them every two years. 

How to Grease Boat Trailer Bearings

It’s easy to service the bearings on your boat trailer at home. With a bit of mechanical knowledge and a willingness to get a little greasy, you can perform this service in your driveway in an afternoon!

Secure the Trailer

Before beginning the project, make sure to secure the trailer. The safest way to do this in your driveway is to hook the trailer up to your truck, put it in park, and chock the wheels with a cinderblock, block of wood, or wheel chock. Be sure you are working on the flattest surface possible.

Jack Up the Trailer and Remove the Wheels

Break the lugs loose on the wheel while it’s still on the ground. Using a floor jack, jack the trailer up enough to get the wheel off the ground. If you have a dual-axle trailer, do one wheel at a time per side.

Remove the Dust Cap

Dust caps prevent contaminants from entering the bearing. To service the bearings themselves, the dust caps need to come off. Using a flathead screwdriver, gently pry the cap off. You can use a hammer or mallet to lightly tap the screwdriver if needed.

If your trailer has Bearing Buddy’s or bearing protectors, a screwdriver will not work for removing them. Instead, gently tap the bearing protector while rotating the hub, and they should come off.

Remove Cotter Pin and Spindle Nut

With the dust cap off, you will see a spindle nut with a cotter pin going through it. remove the cotter pin with plyers. Once the nut is off, you can remove the hub -and the bearings contained within it- from the spindle.

Remove the Bearings 

With the hub off, you can remove the bearing components. They shouldn’t require much force to remove as long as they are not severely rusted or corroded. The front bearing seal can be removed with a seal puller or a screwdriver (the seal will be replaced, so you don’t need to worry about damaging it). With the seal removed, the bearing components will come out easily. To remove the rear bearings, a block of wood can be placed through the hub and tapped, pushing both the bearing and seal out.

The bearings themselves are contained in a metal ring called a race, which will come out of the hub with it

Clean and Inspect the Bearings 

Now that the bearings are out of the hub, it’s time to clean them up. Using a rag, wipe off any excess grease. Using a solvent like kerosene, wash the components clean and inspect them for any rust, corrosion, or damage.

Pack the Bearings with Grease

You can pack bearings by hand or with a packing tool. A bearing packer makes the job far less messy but isn’t required. To do it by hand, take a palm full of high-temperature grease and begin working it into the bearing. Keep doing this until the cage and rollers are filled. Be sure to grease the inside of the hub as well as the bearing races.

Install the Bearings in the Hub

With the bearings packed, you can install them back into the hub. Place the rear bearing into the race and insert it into the back of the hub, followed by the seal.

Take the hub and slide it back over the spindle, with the bearing you just installed going on first. Next, insert the front bearing and race, followed by the washer and nut. If you are having trouble, using a large socket and a hammer can help get the rear bearing flush with the hub. 

Secure, Tighten, and Finish

Using a wrench, tighten the spindle nut to seat the bearings. Next, loosen the nut with the wrench and tighten it again with your fingers – it should only be finger-tight so the hub can rotate freely. Install a new cotter pin and lock the nut in place. Replace the dust cap and that’s it, you’re done!

Boat Trailer Bearing Service at Matson Point S

If you’d rather a professional service your boat trailer, make an appointment at Matson Point S! Our marine specialists will ensure your trailer is ready to go, and won’t leave you stranded on the side of the road on the way to the lake. 

Copyright 2022 | Matson Auto

Website By Automatic Digital Marketing